Cutting and Installation of Pergola Posts
Jump to:
Cut Posts to Length
Cut Top Tenons
(Optional) Chamfer Corners of Posts
Plumb Posts and Attach to Post Bases
Determine Length of Posts
Depending on how accurately you laid out your concrete piers (or if you installed on an existing concrete patio), the post bases may not all be at the same elevation. This presents the obvious problem that the posts can't be all the same length, otherwise the top of the pergola won't be level. To mitigate this, the post offsets must be measured from a reference point and all measured and cut accordingly.
There are a few ways to do this. The first is to set up string lines, similar to what we did when laying out the piers. Make sure the strings are all level and at the same elevation prior to continuing. If you installed on a concrete patio that abuts a house, you might have to get creative, as below.
The sill of this patio door proved to be a convenient reference point. In order to measure off these, we put together a couple scraps of wood to extend the reference line out to the same line as the post bases. Then this extension was clamped to the door sill to hold it in place and one end of a string line was tied to it.
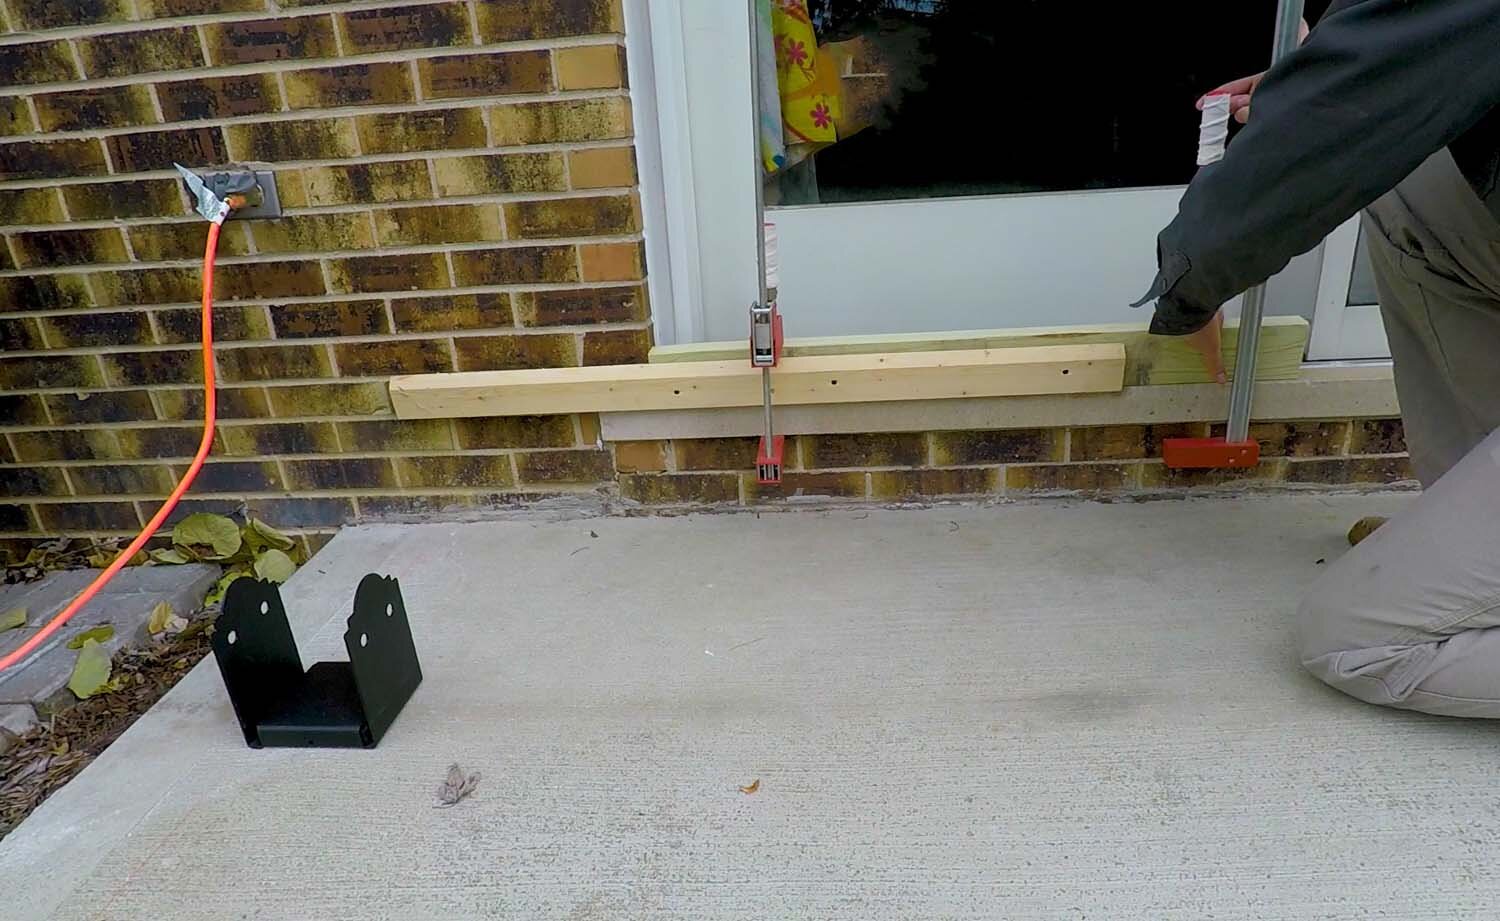
On the opposite end of the line of post bases, A wooden stake was driven into the ground and the string line tied to it. You'll want to make sure that the string line is very tight and is also level. This string line is now at the exact same elevation as the door sill.

When you're satisfied with the string line, measure the distance between the string and the bottom of the post base, and record this number. Do the same with the next post base in line, then repeat these steps for the other posts. You should have measurements written down that correlate to each post of the pergola. It will be convenient to name these “A” through “D” to keep things straight, or some other naming scheme that suits your taste.
If you have a self-leveling laser level (affiliate link), then setting up the string lines is not necessary. Simply wait until the sun is low enough that you can see the laser, and use it to determine the offset measurements for the post bases.
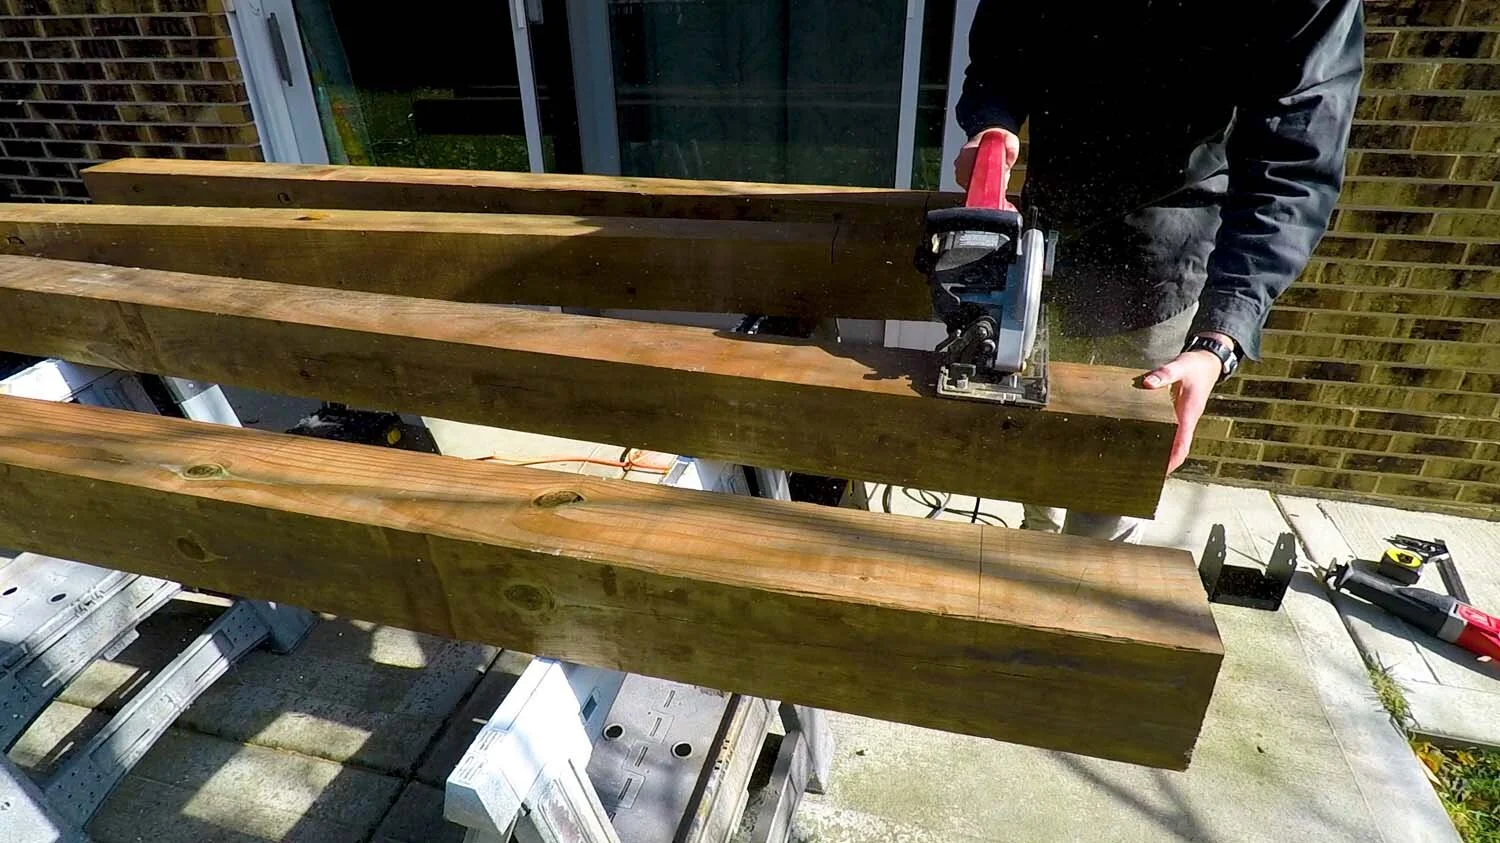
Cut Posts to Length
The length of the posts is determined based on the offsets measured in the previous step. Begin by marking each post “A” through “D” (or whatever your naming scheme is) and then measure from the bottom of the post the offset length you previously recorded for each. Use a square to transfer this line across the width of the post.
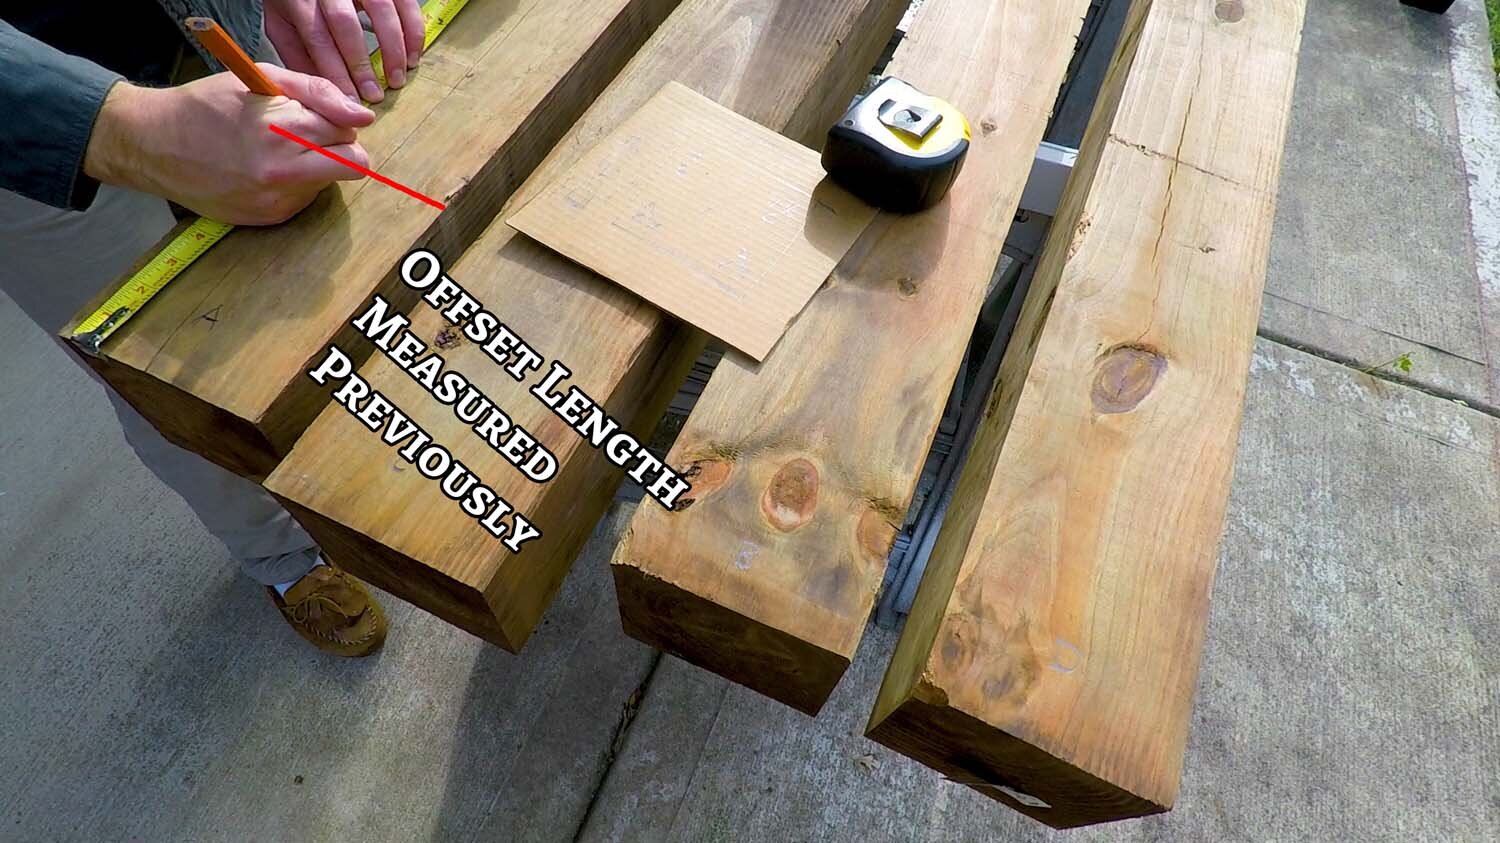
Next, start with the longest measured offset - let's say 10″ for instance. If the posts are 8 feet long, the “leftover” length is (8′-0″ - 10″) = 7′-2″. Measure the “leftover” 7′-2″ from the offset marks you previously made on each post, and mark these at the top ends. Use a square to transfer this mark all around the posts so that you have a cut line wrapping around the post.

Using a circular saw, cut along this line on each post, then flip the posts to cut the opposite face from the first cut.
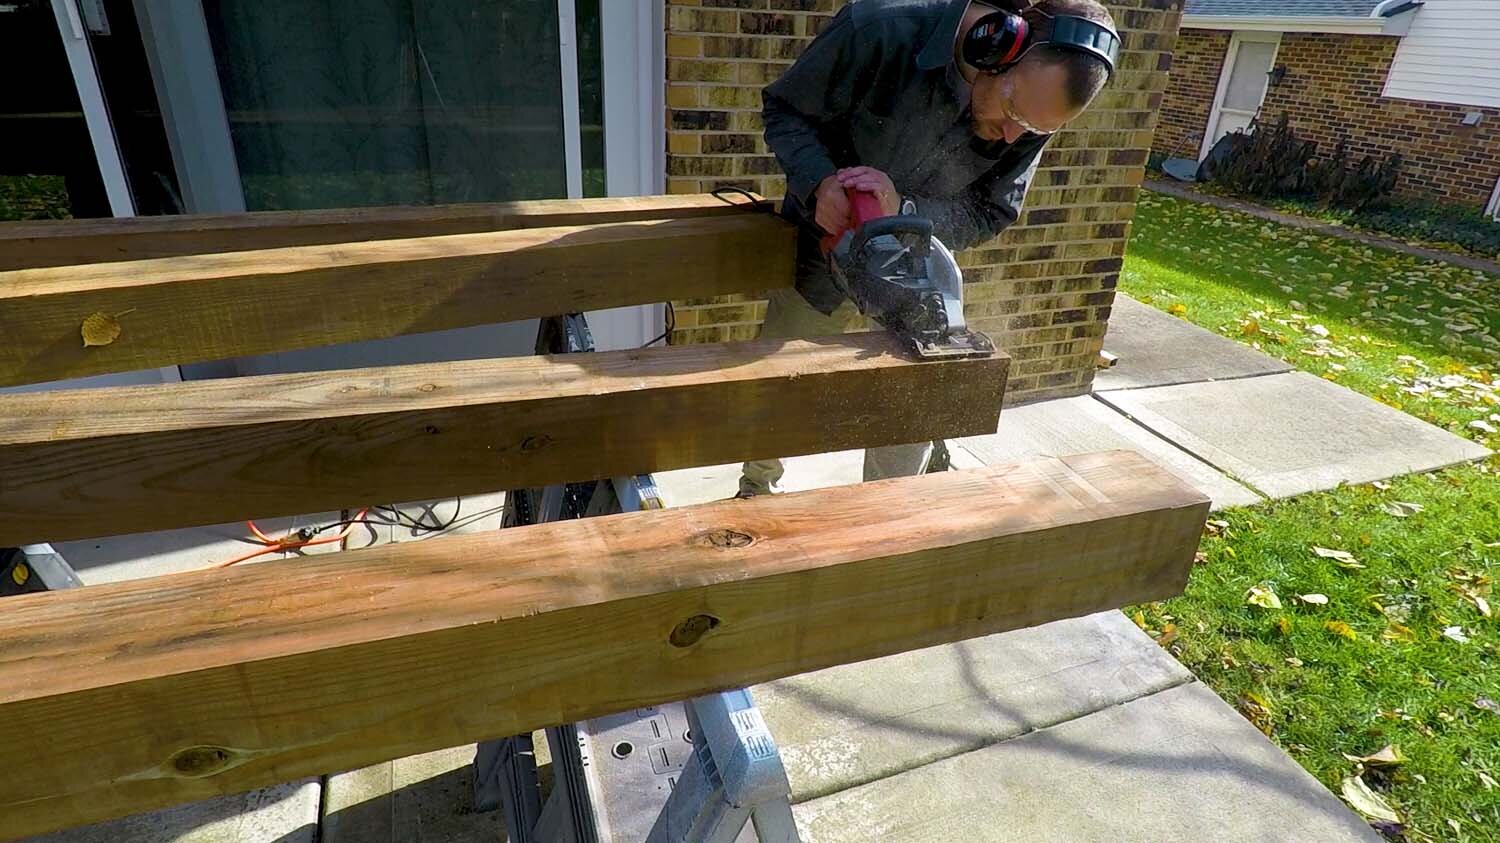
Use a reciprocating saw to finish the cut, assuming that your circular saw doesn't cut all the way through with the first two passes.

Cut Top Tenons
The tops of the posts need to be cut into a tenon to hold the beams. We provide drawing details for the cuts that need to be made, so refer to those for the dimensions.
Measure down from the newly-cut top of the posts to the dimension specified. Make a mark and square it across the width of the post with a speed square. Transfer this mark all around the post.

Next, measure in from one face for the shoulder of the tenon. Mark this for the full depth of the beam, which is easily done with a combination square, but which you can easily do by making two marks and connecting them with a straight edge. Do this for both opposing faces of the post to establish the cut lines for the tenon.
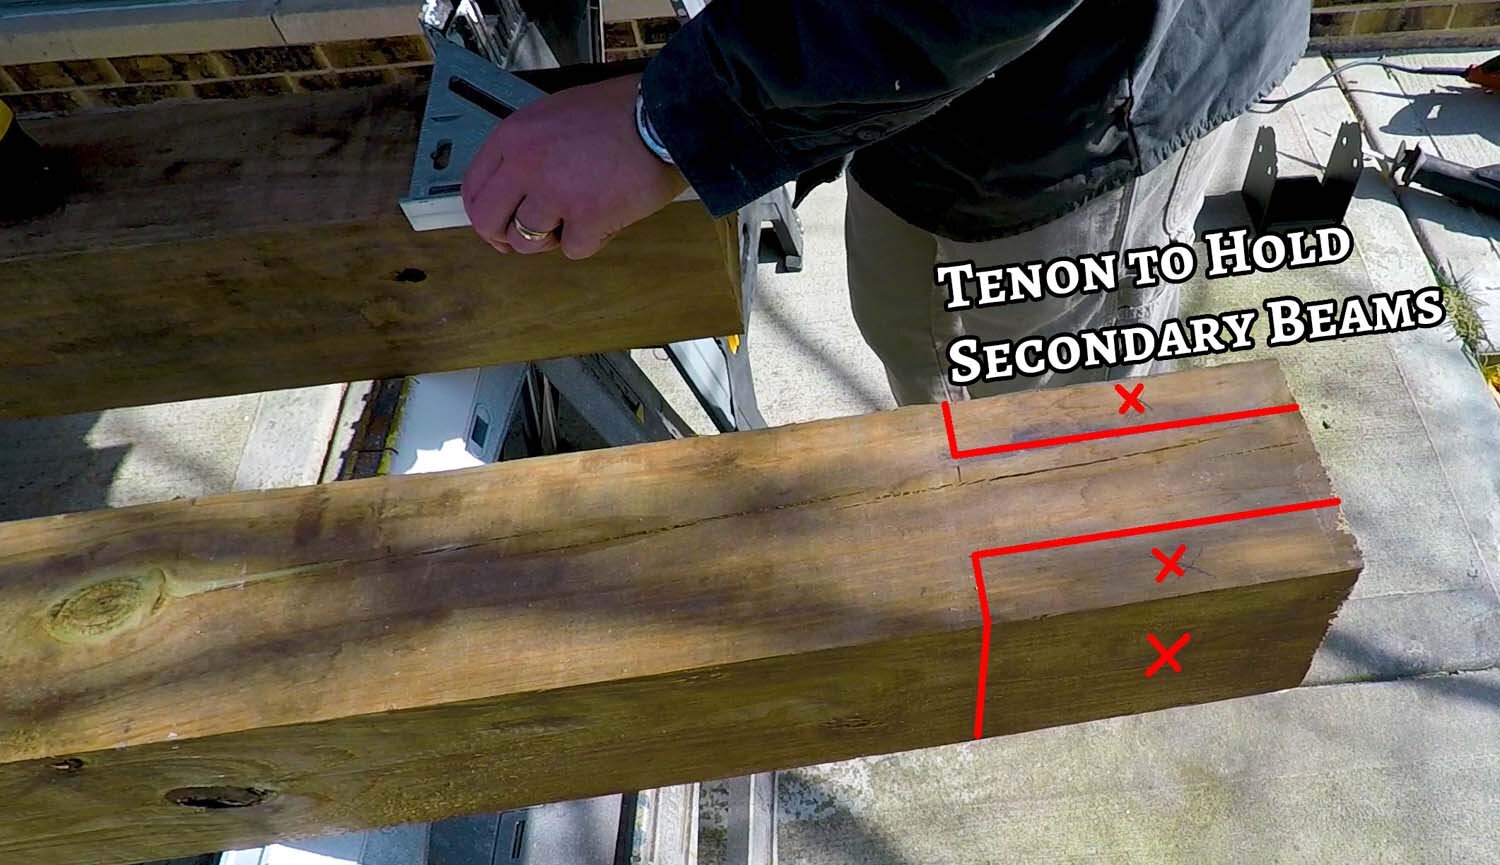
Using the circular saw, set it to cut the depth given on the drawings, and make a cross-cut to establish the shoulder of the tenon. Roll the post and make the same cut on the opposite face.
Reset the circular saw to its maximum cut depth and roll the post 90 degrees to begin cutting the faces of the tenon. You want to stop when the saw blade meets the shoulder cut that you previously established. Don't over-run the shoulder cut, or your joint will look quite bad. Make the other cheek cut on the same side of the post, then roll it to cut the cheeks on the opposite face.

Finally, finish the cut with the reciprocating saw.

(Optional) Chamfer Corners of Posts
This next step is optional, but we highly recommend it. Put a 45-degree chamfer bit in a palm router, and use this to ease the edges of the post from bottom to top. Make the chamfer about 1/4″ x 1/4″. Not only does this provide a pleasing look to the posts, but it protects the corners from splintering off from an errant bump and also softens the corners should someone run into them.

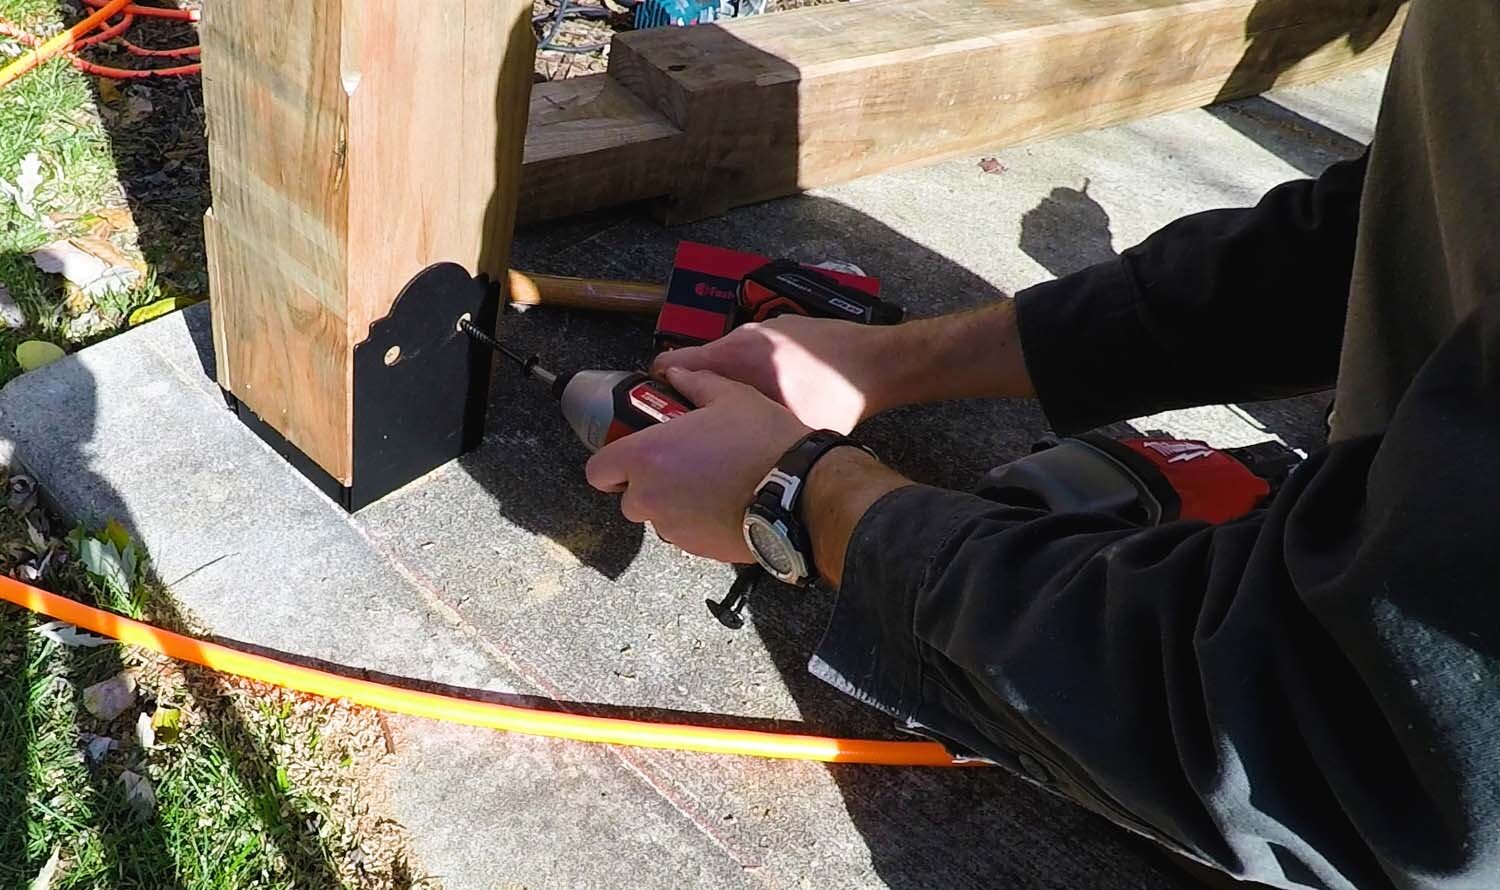
Plumb Posts and Attach to Post Bases
With the posts cut, all that’s left to do is mount them in the post bases.
At one of the corners, place a post in the post base, but laying down on the ground. Pound in a wooden stake about 6 feet away from the post base next to the laid-down post, and another one 90 degrees around the post so that you can brace from both sides. Take two of the spare 2x4s, and attach each at each of these stakes with a single nail for now, and lay them down also.

Stand the post up and grab one of the braces you previously laid down, and bring the brace around into contact with the post. Using the 4-foot level, plumb the face of the post aligned with the brace. Once satisfied with the plumb-ness of the post, use a nail to tack the brace in place.

Grab the other brace, and repeat the steps above to plumb the post from the other direction. Double check that the post is still plumb in both directions, then go ahead and drive another couple nails into the brace at either end.

Now, take your drill with a drill bit slightly smaller than the post base screws, and pre-drill holes to match those in the post base. Drive the screws into these holes, making sure to include the decorative washer (if used). At this point, your post should be secure top and bottom and shouldn't move when casually jostled.
If you're building this pergola close to a house, you may have to brace the adjacent post against the first one, as in the picture below.

Previous Step: Layout and Installation of Concrete Piers and Post Bases
Instructions provided by Apex Pergola Design are solely for informational purposes and are provided without warranties or guarantees of any kind. Builder/Installer is solely responsible for construction of the pergola and shall be responsible for identifying, reviewing, and complying with the applicable building codes in effect at the time of pergola construction and ensuring the pergola construction complies with such building codes and requirements.. Apex Pergola shall not be liable for any claim, loss or damage arising out of: (a) any misuse or unauthorized usage of the Plans provided; (b) any constructions, structures or designs made by the Client or a third party on the basis and in reliance on the Plans or (c) any other circumstances beyond Apex Pergola’s reasonable control.