Cutting and Installation of Main and Secondary Pergola Beams
Jump to:
Cut the Secondary Beam Tails
Calling these “secondary” beams might seem a little odd since they go in first, but since they resist practically no bending load, the term is fitting.
Bring over the secondary beams from the pile and set them on the sawhorses. If they’re not already at the proper length, cut them to the length specified on the drawings. We have many different beam tail designs available in our Store if you’re looking for a foolproof template. The example below is a simple curve reminiscent of the Classic Arc, but feel free to be as creative as you please.

Using a jigsaw, cut out the tail of the beam.

With the cutoff piece, trace the remaining tails of the beams, and proceed to cut them out too.

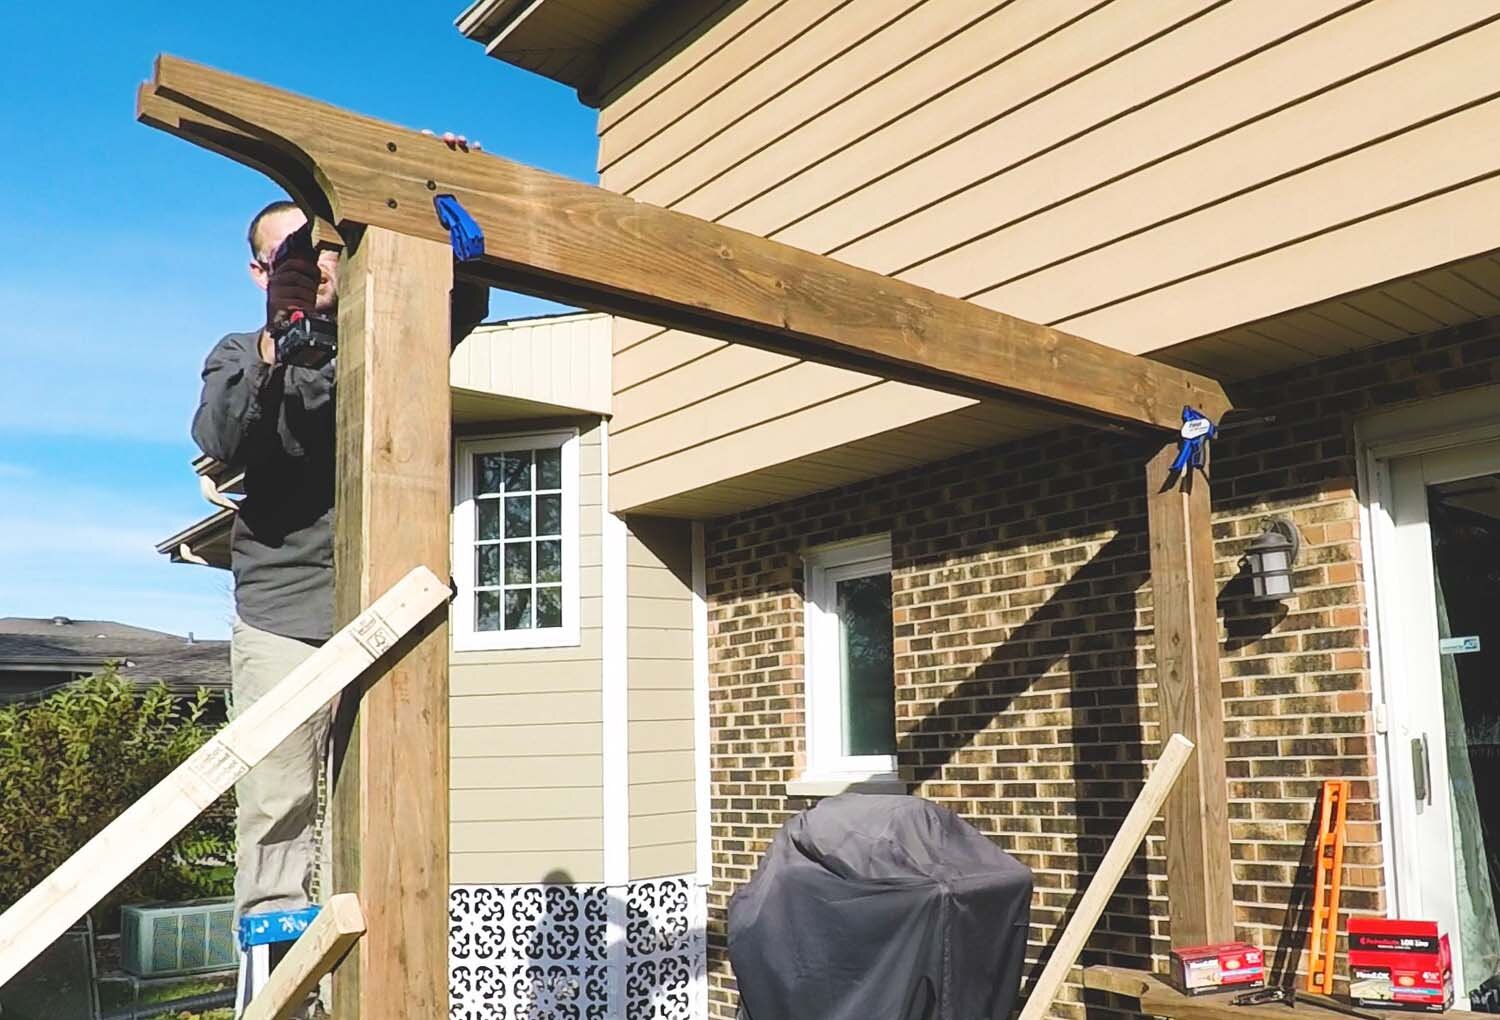
Install the Secondary Beams
After cutting the decorative ends of the beams, the next step is installation.
This is one step where having a clamp or two is helpful. Hoist one of the secondary beams up to the top of the posts and rest it in the notch cut previously. If you have a clamp, use it to hold the beam in place. If not, hopefully someone can hold it there for you, otherwise you might be rolling the dice with it possibly dropping on your head.

Using the drill, pre-drill holes where the beam sits on the post. Then drive home the fasteners to attach the beam to the post. Repeat this on the other end of the secondary beam.

Place the second secondary beam on the opposite side of the post, and repeat the steps above to fasten it. Then, at the other end of the pergola, install the remaining two secondary beams. If you braced one post back to the other, you can remove this at this point since the beams are providing the same function.
Cut the Main Beams
Bring the main beams over to the sawhorses and cut to length, if not already done. Trace out and cut the tails, same as you did with the secondary beams.
Next, roll all of the beams such that the bottom edges are facing upwards and clamp them together. Measure the distance between the secondary beams at the top of the pergola, and also the distance between adjacent secondary beams where they attach to the posts. You should be able to determine this distance from the drawings, but this is a good check in case you have something slightly off with the posts’ installation.
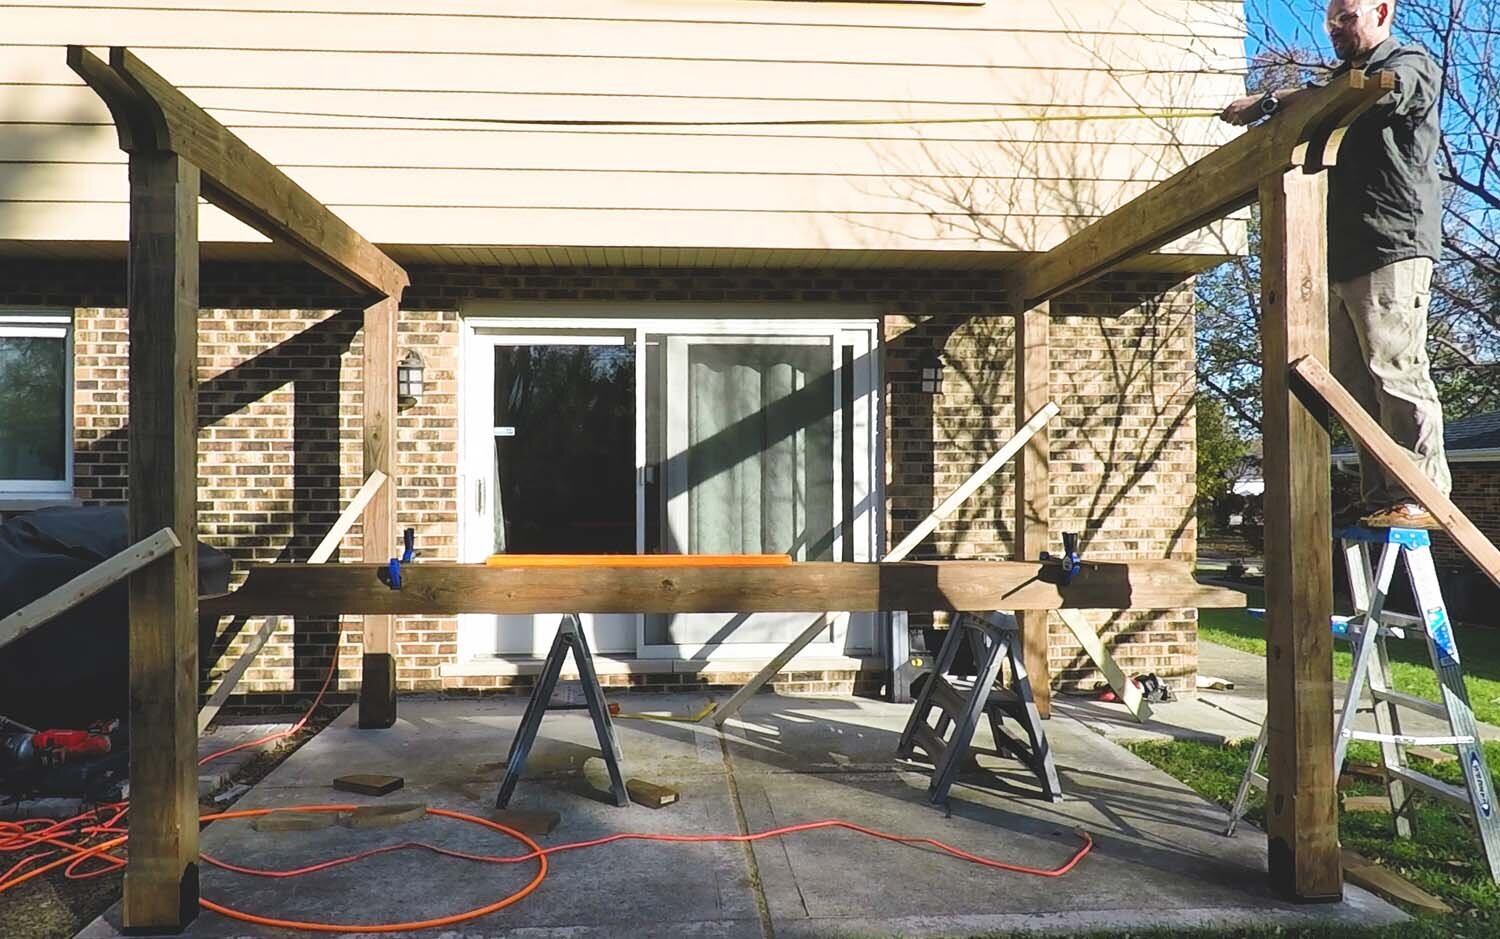
Mark these distances on the main beams, being sure to center everything on the length of the beam so that the overhang is the same on both ends. I would suggest adding a heavy 1/16" oversize on the thickness allowance for the secondary beams, just to allow the main beams to fit over them a little easier. Don't overdo this though, otherwise the fit will be too sloppy.

Set your circular saw depth as shown in the drawing detail and cut just inside the lines you marked, which form the walls of the half-lap notches. Then, use the circular saw to cut between these lines and form “fingers,” effectively making the notch look like []_[]_[]_[]_[] when viewed from the side.

This will make it easy to knock the waste out with a chisel, and use the chisel to clean up the bottom of the notches.
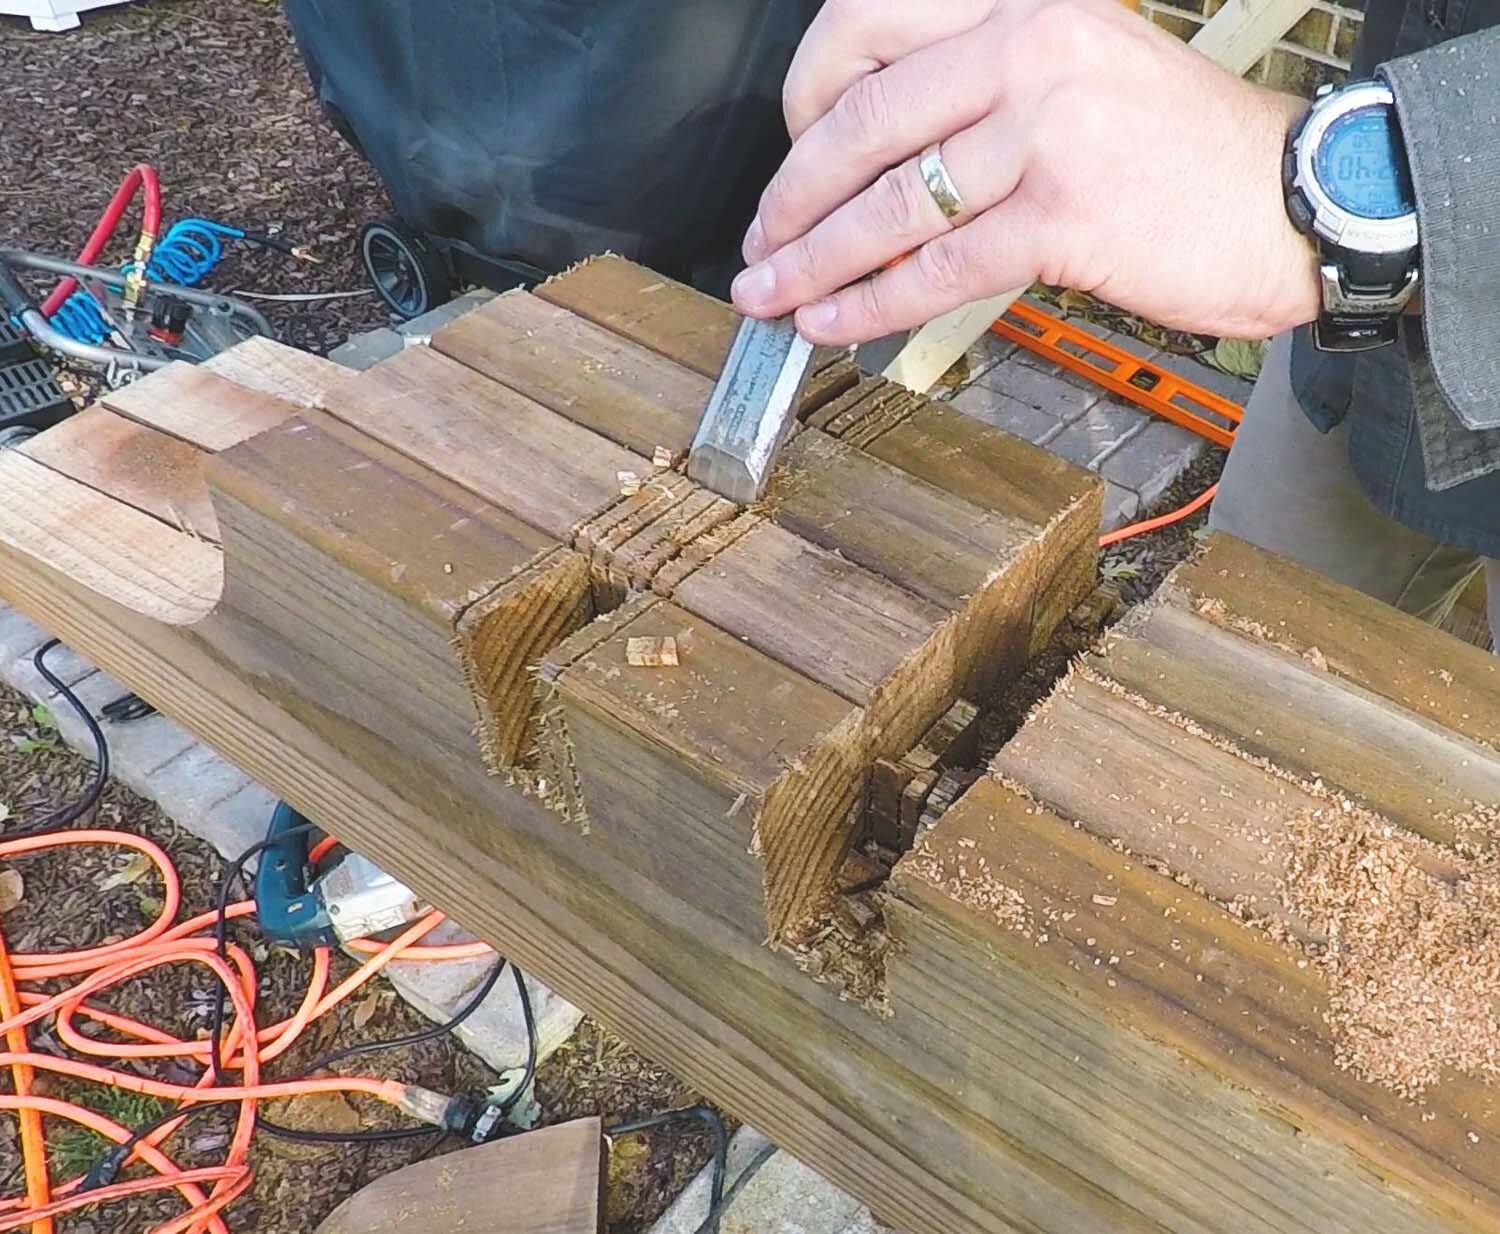
Pro Tip: if you have a router with a flush trim bit, you can use this to very quickly smooth the bottoms of the notches.

Install Main Beams
Unclamp and hoist a main beam up to the top of the pergola, resting it on the secondary beams. Roll it over and slip the half-lap notches over the secondary beam, butting the main beam up against the posts.
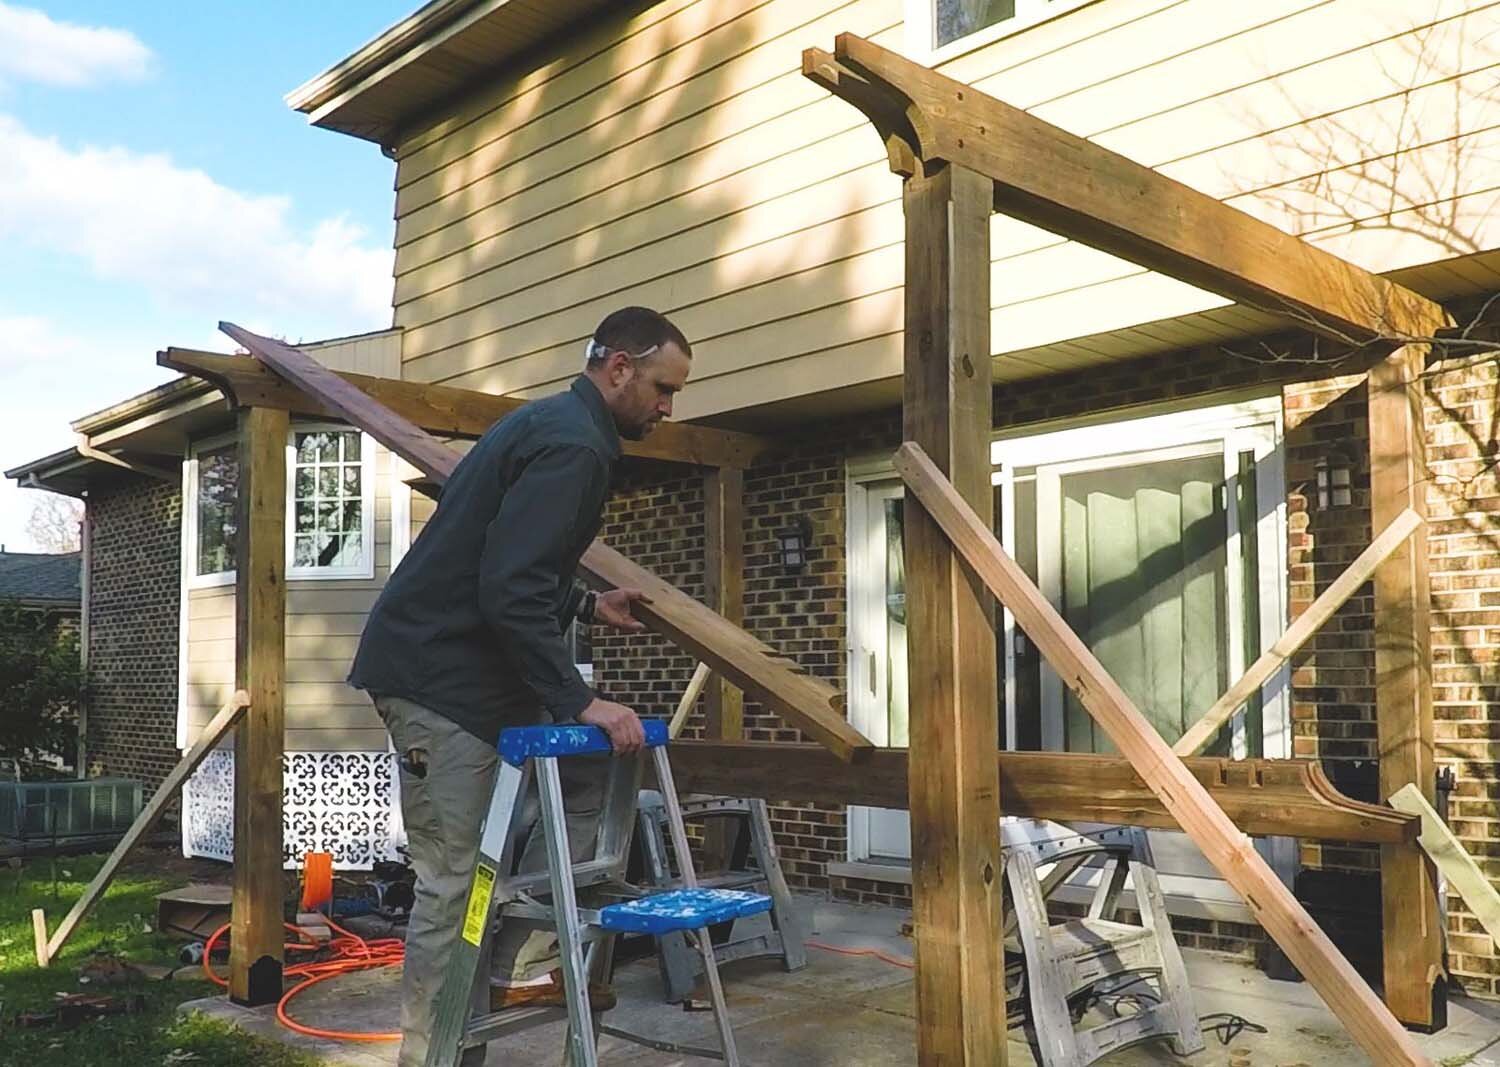
You may have to persuade it into position with a mallet or sledge.

Once you're satisfied with the location, fasten it into the posts. Repeat the above steps for the remaining main beams.

Previous Step: Cutting and Installation of Posts
Next Step: Cutting and Installation of Braces
Instructions provided by Apex Pergola Design are solely for informational purposes and are provided without warranties or guarantees of any kind. Builder/Installer is solely responsible for construction of the pergola and shall be responsible for identifying, reviewing, and complying with the applicable building codes in effect at the time of pergola construction and ensuring the pergola construction complies with such building codes and requirements.. Apex Pergola shall not be liable for any claim, loss or damage arising out of: (a) any misuse or unauthorized usage of the Plans provided; (b) any constructions, structures or designs made by the Client or a third party on the basis and in reliance on the Plans or (c) any other circumstances beyond Apex Pergola’s reasonable control.