Cutting and Installation of Pergola Purlins
In the home stretch now! Installing the purlins is the last step before your pergola is finished.
Jump to:
Cut the Purlins
Trim the purlins to length, if not already done.
Again, trace the end treatments and cut them with a jigsaw.

After this, flip them bottom-up, line the boards up, and clamp them together. Most likely the boards will all have some slight bend to them, so you may have to fiddle with the boards to get the bottom edge relatively even across all the boards. Mark the half-laps where the purlins fit over the rafters considering the rafter spacing specified in the design drawings.

Set your circular saw to the depth given on the design drawings and begin the somewhat long progess of notching out for all the half-laps at the rafter locations. It’s a bit tedious, but take your time here so that the end result looks good.
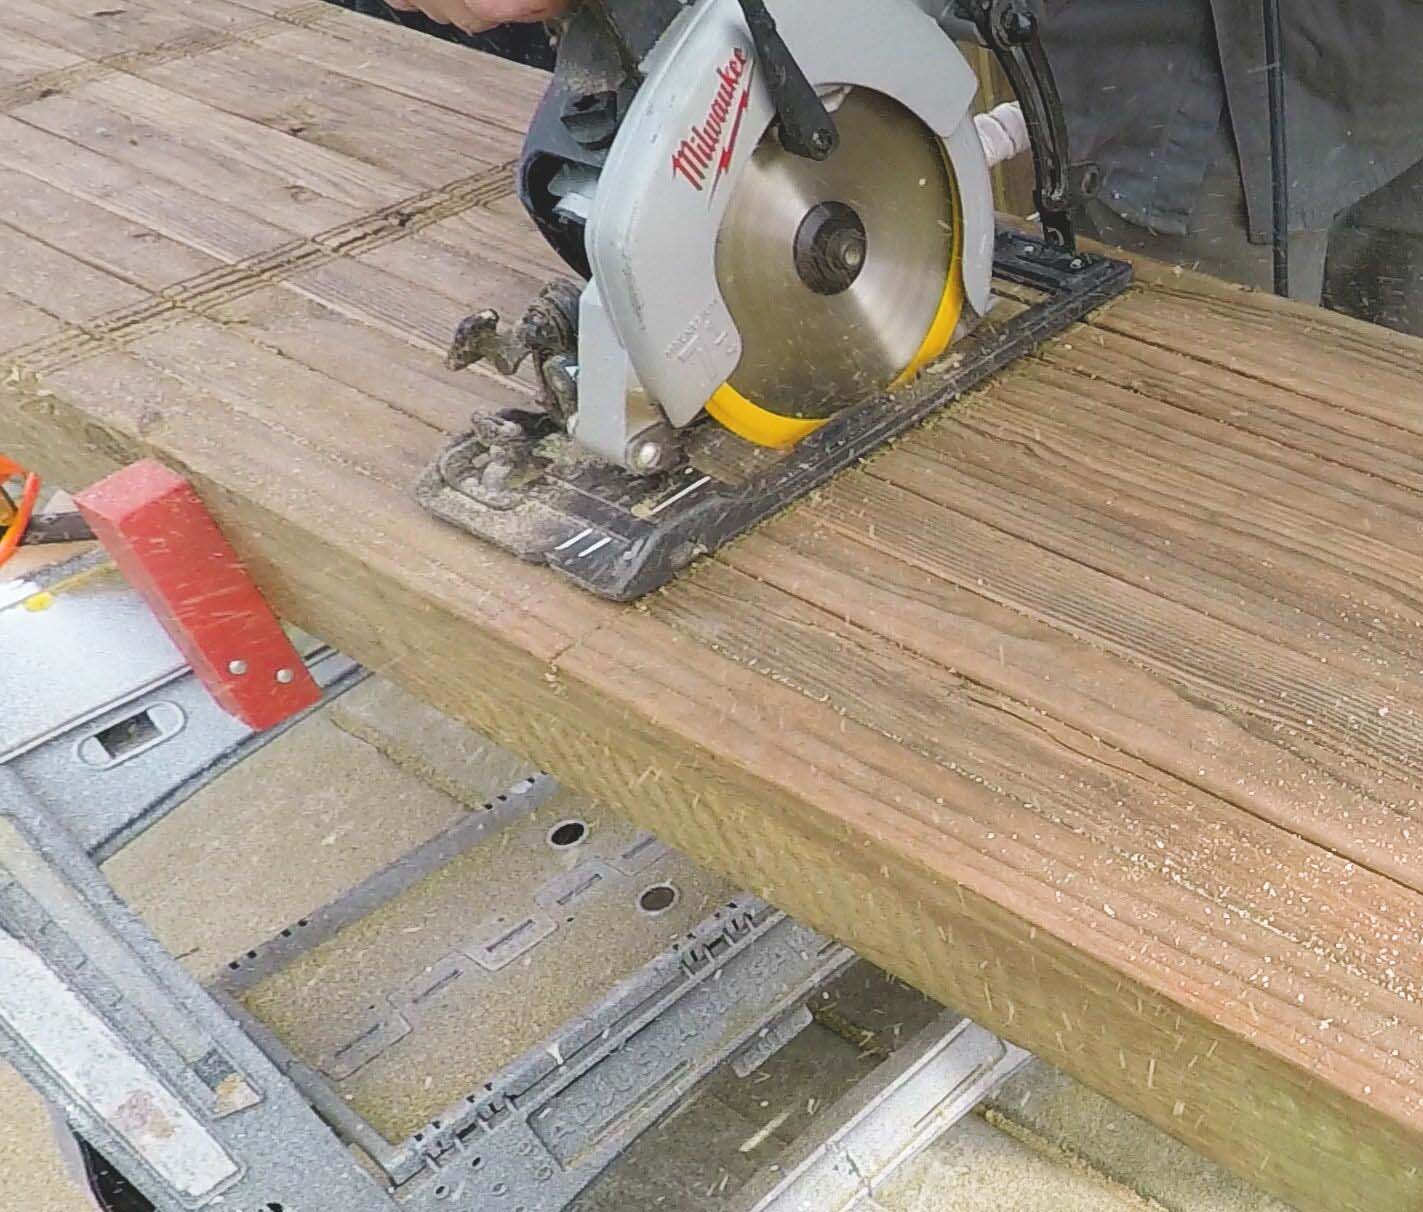
Given all of the lap joints, cutting and chiseling them will take a little while. We’ve found it easiest to pop most of the waste out of the notches with a chisel first.

Then follow up with a flush trim router bit to smooth the bottoms of the notches.

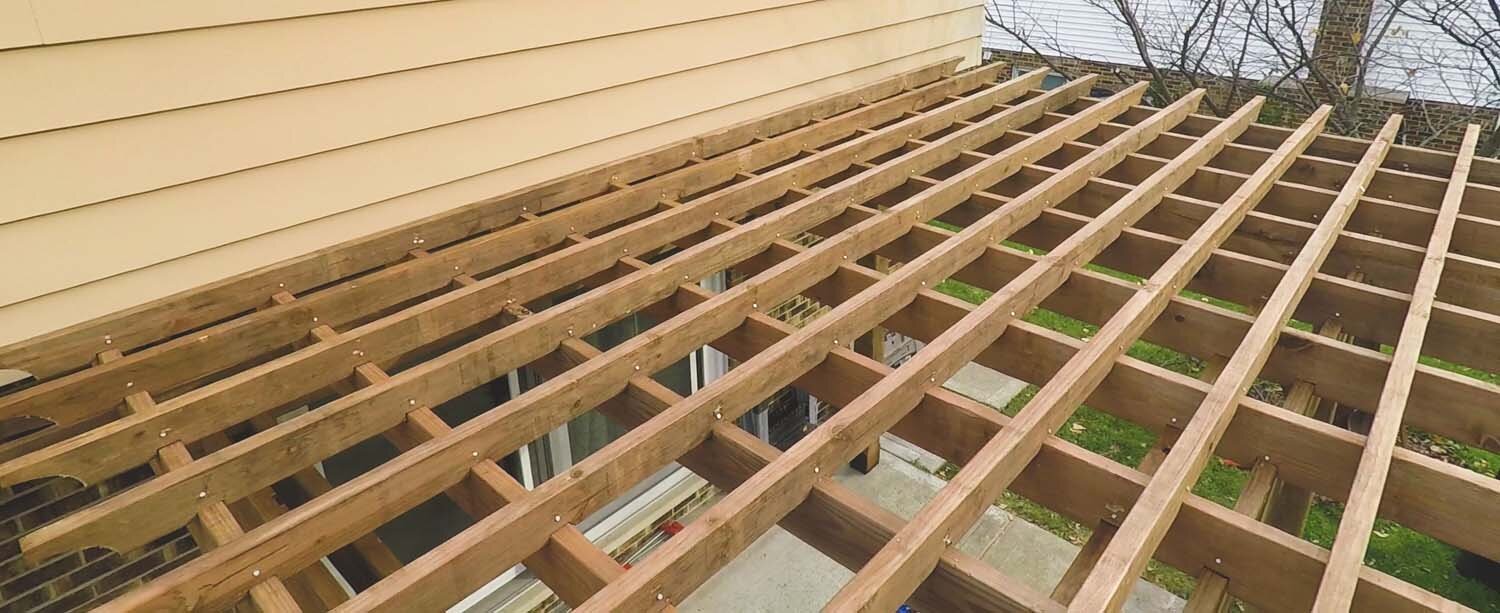
Install the Purlins
Similar to the previous step, determine the spacing of the purlins on the rafters. Mark this spacing on either side of the pergola. If you have two people, it's then a relatively simple matter to stretch a chalk like across the pergola and snap marks for each purlin on the tops of the rafters. If you're working by yourself, this is also possible, though much more time-consuming.

Flip the purlins over on the sawhorses so that the top edge is facing up, and pre-drill through the depth of the purlin at the center of each half-lap joint. Then hoist the purlins up on top of the rafters. It may be a good idea to start the purlin fasteners in the pre-drilled holes prior to lifting the purlins up top, since this saves having to fiddle with screws while up there.

Install the purlins in the same manner as the rafters, just using the specified purlin fasteners instead. In a few spots, you may have to clamp the purlin to the rafter at the half-lap because one of the boards has a bend in it and they aen't making full contact.

Once all the purlins are installed, your pergola is done!
We hope this tutorial has been helpful and instructive. If you have any further questions or if you have any suggestions, please let us know.
Previous Step: Cutting and Installation of Rafters
Instructions provided by Apex Pergola Design are solely for informational purposes and are provided without warranties or guarantees of any kind. Builder/Installer is solely responsible for construction of the pergola and shall be responsible for identifying, reviewing, and complying with the applicable building codes in effect at the time of pergola construction and ensuring the pergola construction complies with such building codes and requirements.. Apex Pergola shall not be liable for any claim, loss or damage arising out of: (a) any misuse or unauthorized usage of the Plans provided; (b) any constructions, structures or designs made by the Client or a third party on the basis and in reliance on the Plans or (c) any other circumstances beyond Apex Pergola’s reasonable control.